Steam Bent Oak Long Board
After producing a dozen or so flat hardwood long boards, I thought it would be fun to do a hardwood board with camber. Laminated boards achieve shape and curvature by gluing thin pliable veneers while pressed to a form. But laminated boards have a completely different aesthetic to them. The other way to add shape to hardwood is by steaming the wood, melting the lignen (the natural polymer that gives wood rigidity) and clamping it to a bending form. When the wood cools, the lignen resolidifies and the wood regains its rigidity, but in its new form. While steaming is often used for curved chair backs, table legs and cabinetry handles, my first steaming project was a long board.
Required Resources: 25 hours, $150
Size: 8" x 32" x 0.75"
Materials: Oak
Finish: Minwax Natural Stain, Semi-gloss polyurethane aerosol
Tools: Band Saw, Miter Saw, Stationary Belt Sander, Orbital Sander,
New techniques: Steam Bending
the Steam Box
In order to steam wood, a steam box needs to be constructed. A steamer heats a water reservoir and pipes the steam into the box. The box can be made of any wood, but should be air tight except for a "bleed" hole, that allows air to escape and stops pressure from building in the box.

The steam box made of common pine board with internal dimensions of 10"X8"X48". The steamer is a bath with a heating element embeddded in the plastic. A corrugated hose pipes in the steam into the back of the box.
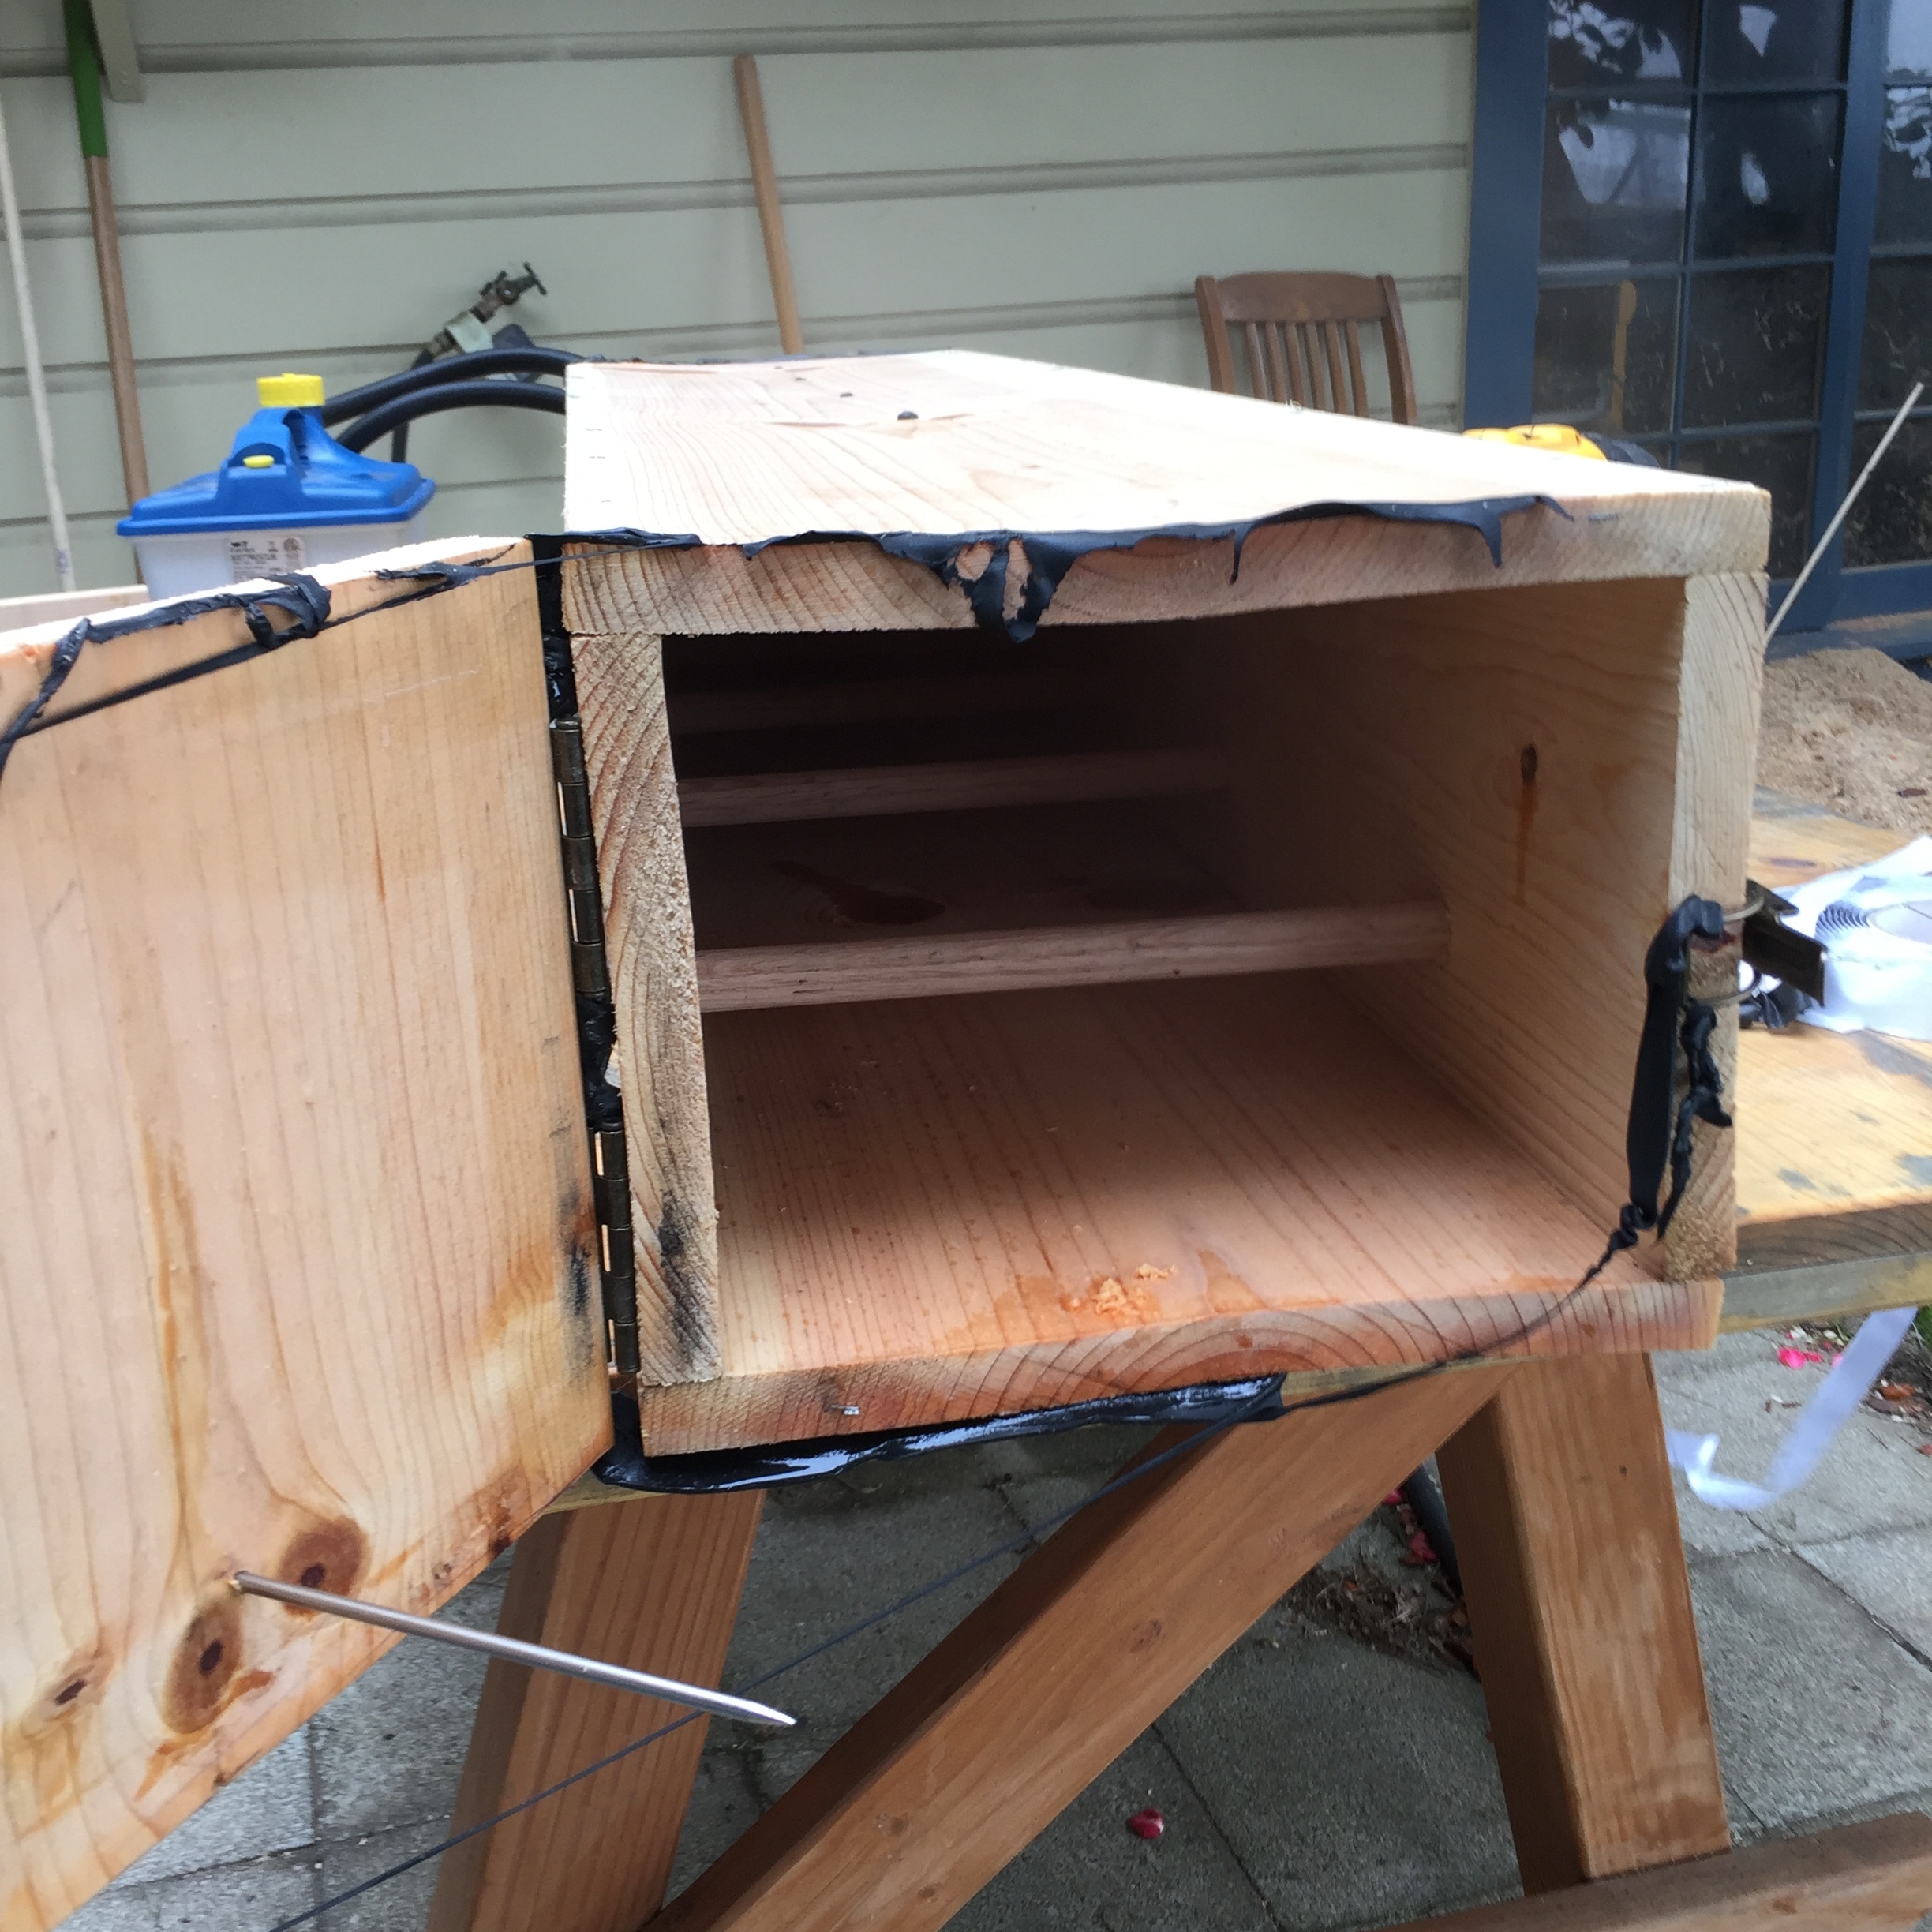
The front of the steam box is covered with a hinged lid. A padded tape is used on the box rim to seal the box when latched closed. Rods strung across the box create a rack for the material to be steamed. A meat thermometer is pushed through a port in the lid to monitor internal temperature.

Blankets draped over the box to add insulation. In preliminary attempts to steam bend, the large volume of the box caused the the steamer to run out of water before the temperature reached operating temp (100 C). Insulation helps keep the energy in the box and allows the stasis temperature to reach 100 C.
Bending With Steam
After steaming the material is to be bent around a form and left to set. In a high volume steaming set up, the part is left on the steaming form (which is over bent to allow for spring back) for 10 minutes. After the part cools it is transferred to a cooling mold of the exact final shape of the part for another 24 hours and allowed to set. In this setup, since it was designed to produce one offs, the bending form doubles as the cooling form.

A steam bending form made of pine lumber. The cleat on the front is meant to capture the leading edge of the steamed board. The board is then bent over the form and clamped along its length. In this case, the bend was too extreme and the cleat was abandoned.

For most woods, general wisdom is 1 hour of steam per inch of thickness of material. Steam time starts when the internal temperature of the box reaches 100 C. For this build the material was ~0.75" thick, and as such was steamed for 45 minutes. Steam for too little time and the material is not pliable enough to bend. Steam for too long and the material is liable to wrinkle along the bend.

The steamed wood is immediately clamped to the form before it cools. The form over bends the material so that when the clamps are released the part springs back to the right shape. There is a bit of guess work and iteration to get the shape exactly right.
Finishing the Board
Almost done.
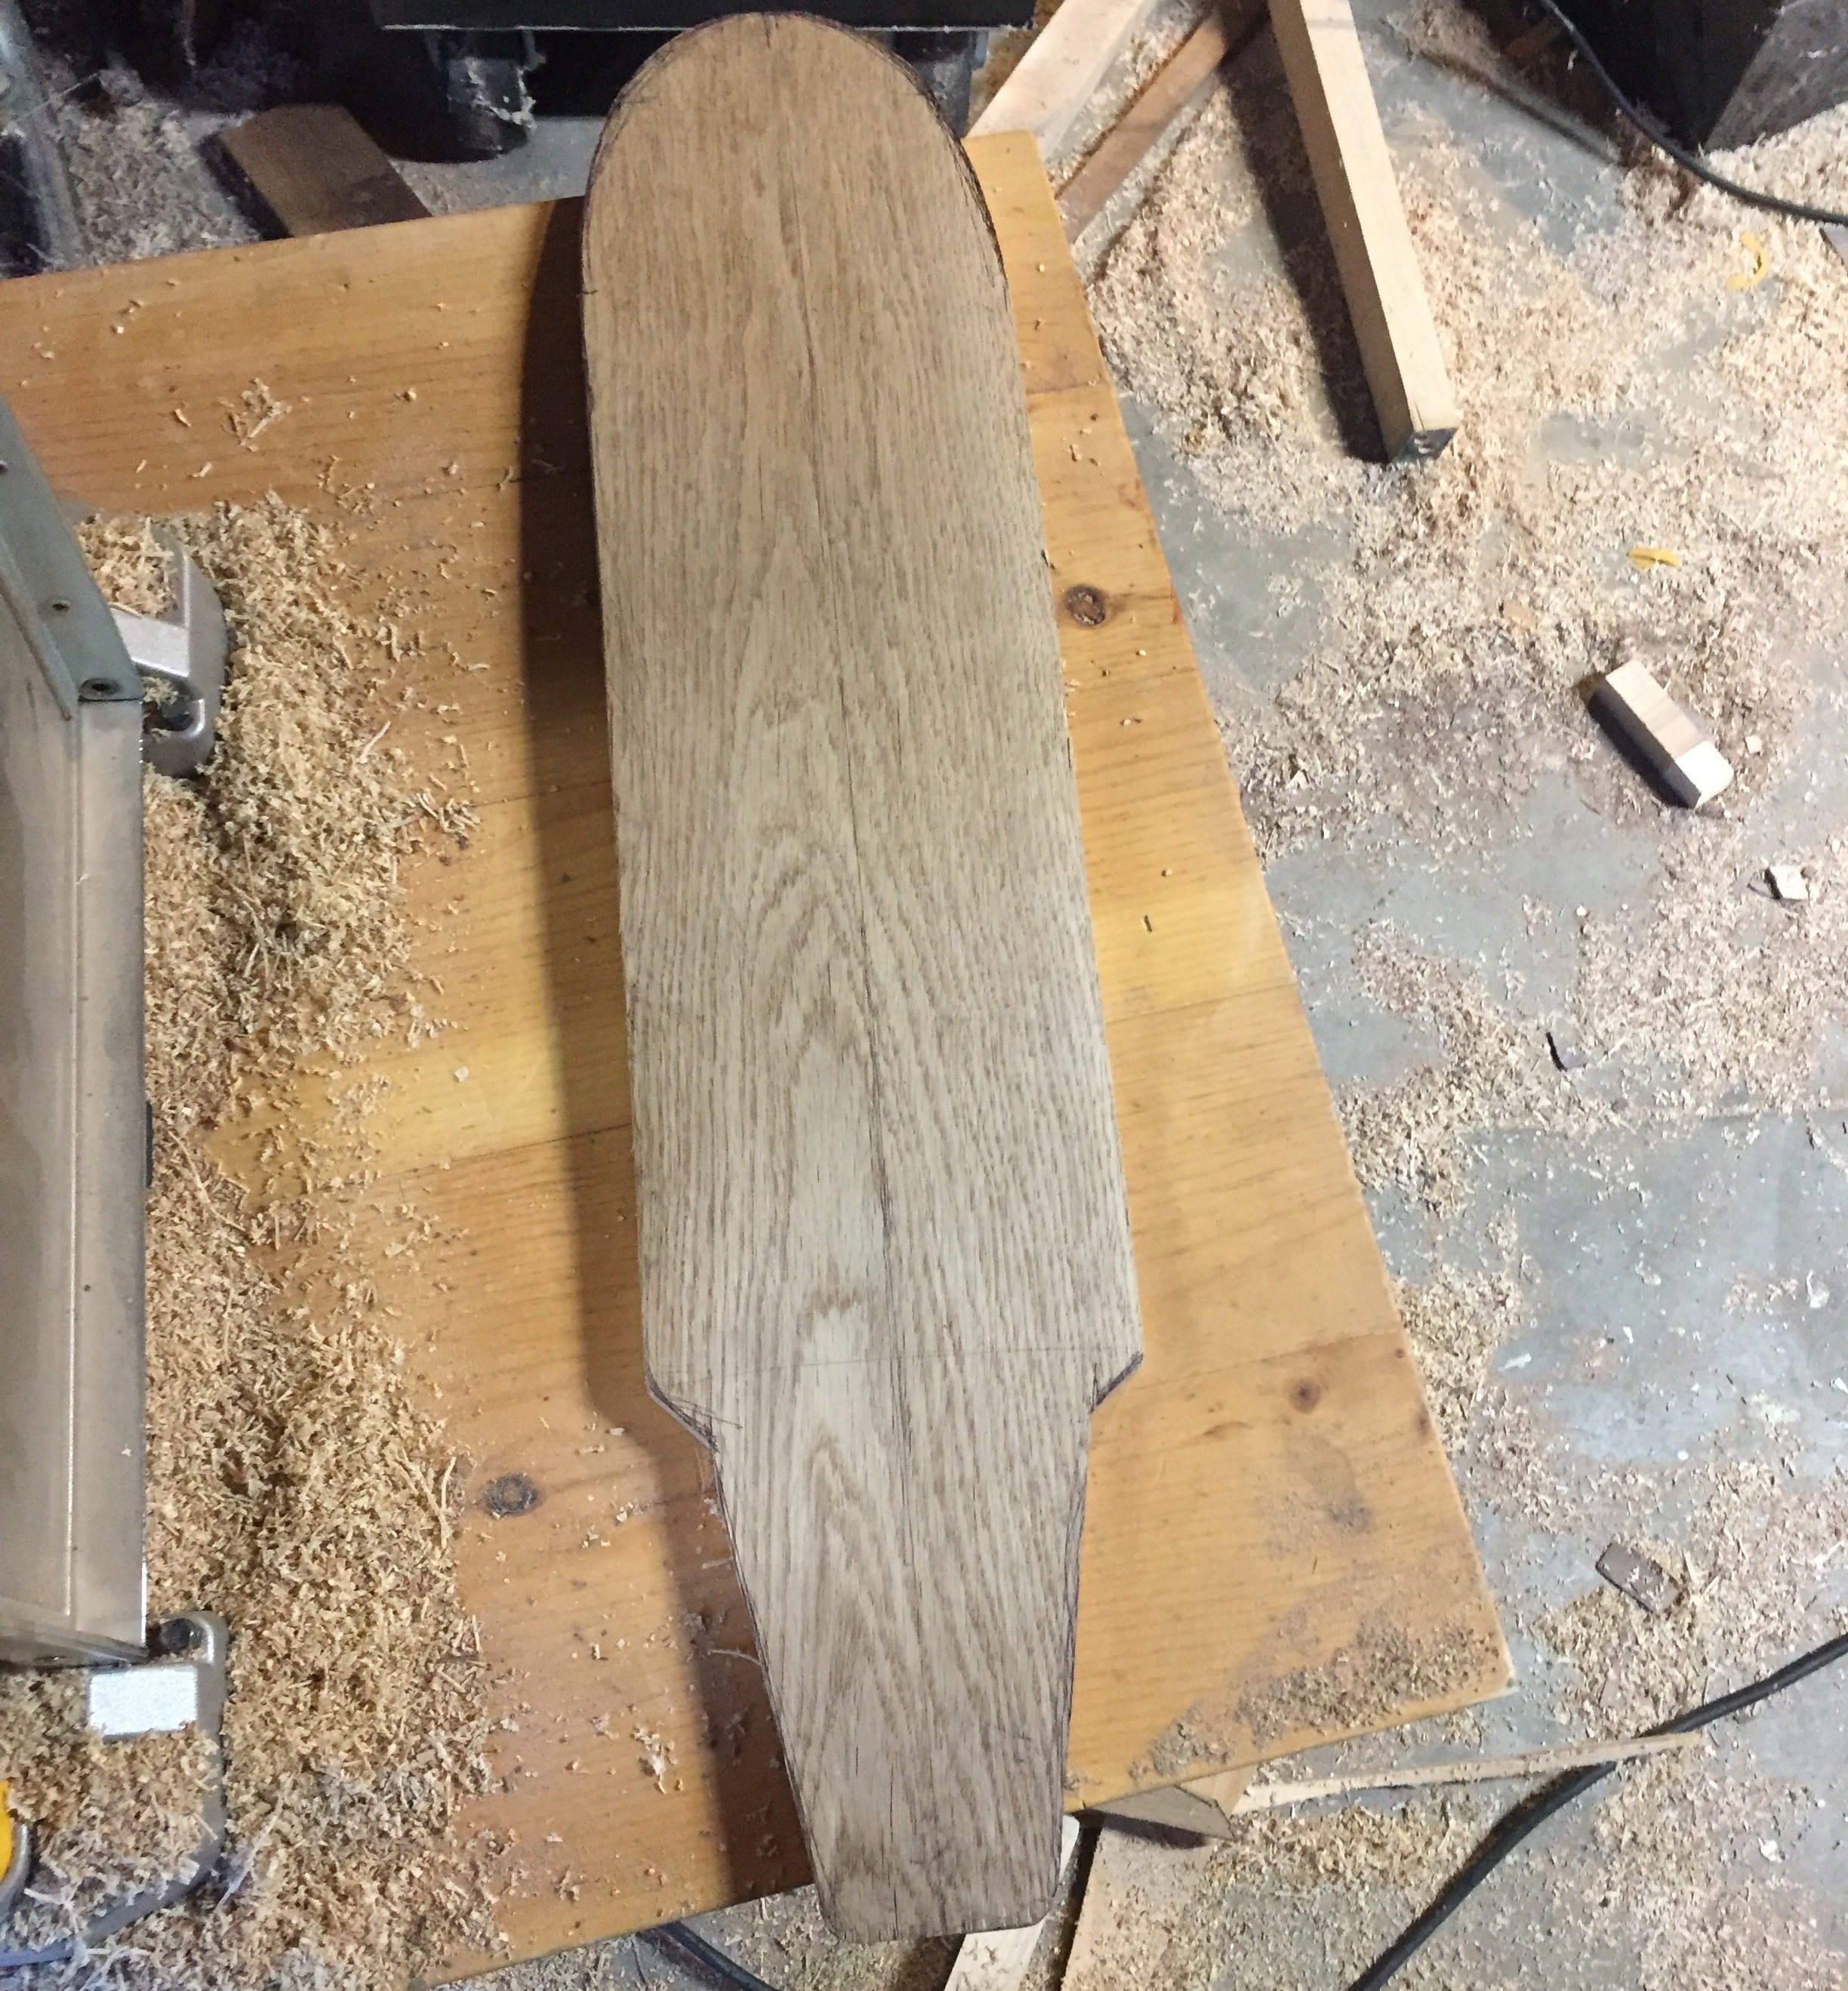
The wood has the positive camber I was looking for, but the kick tail is not quite as defined as I hoped. I rough cut the board and marked the center line for trucks mounting hole alignment.
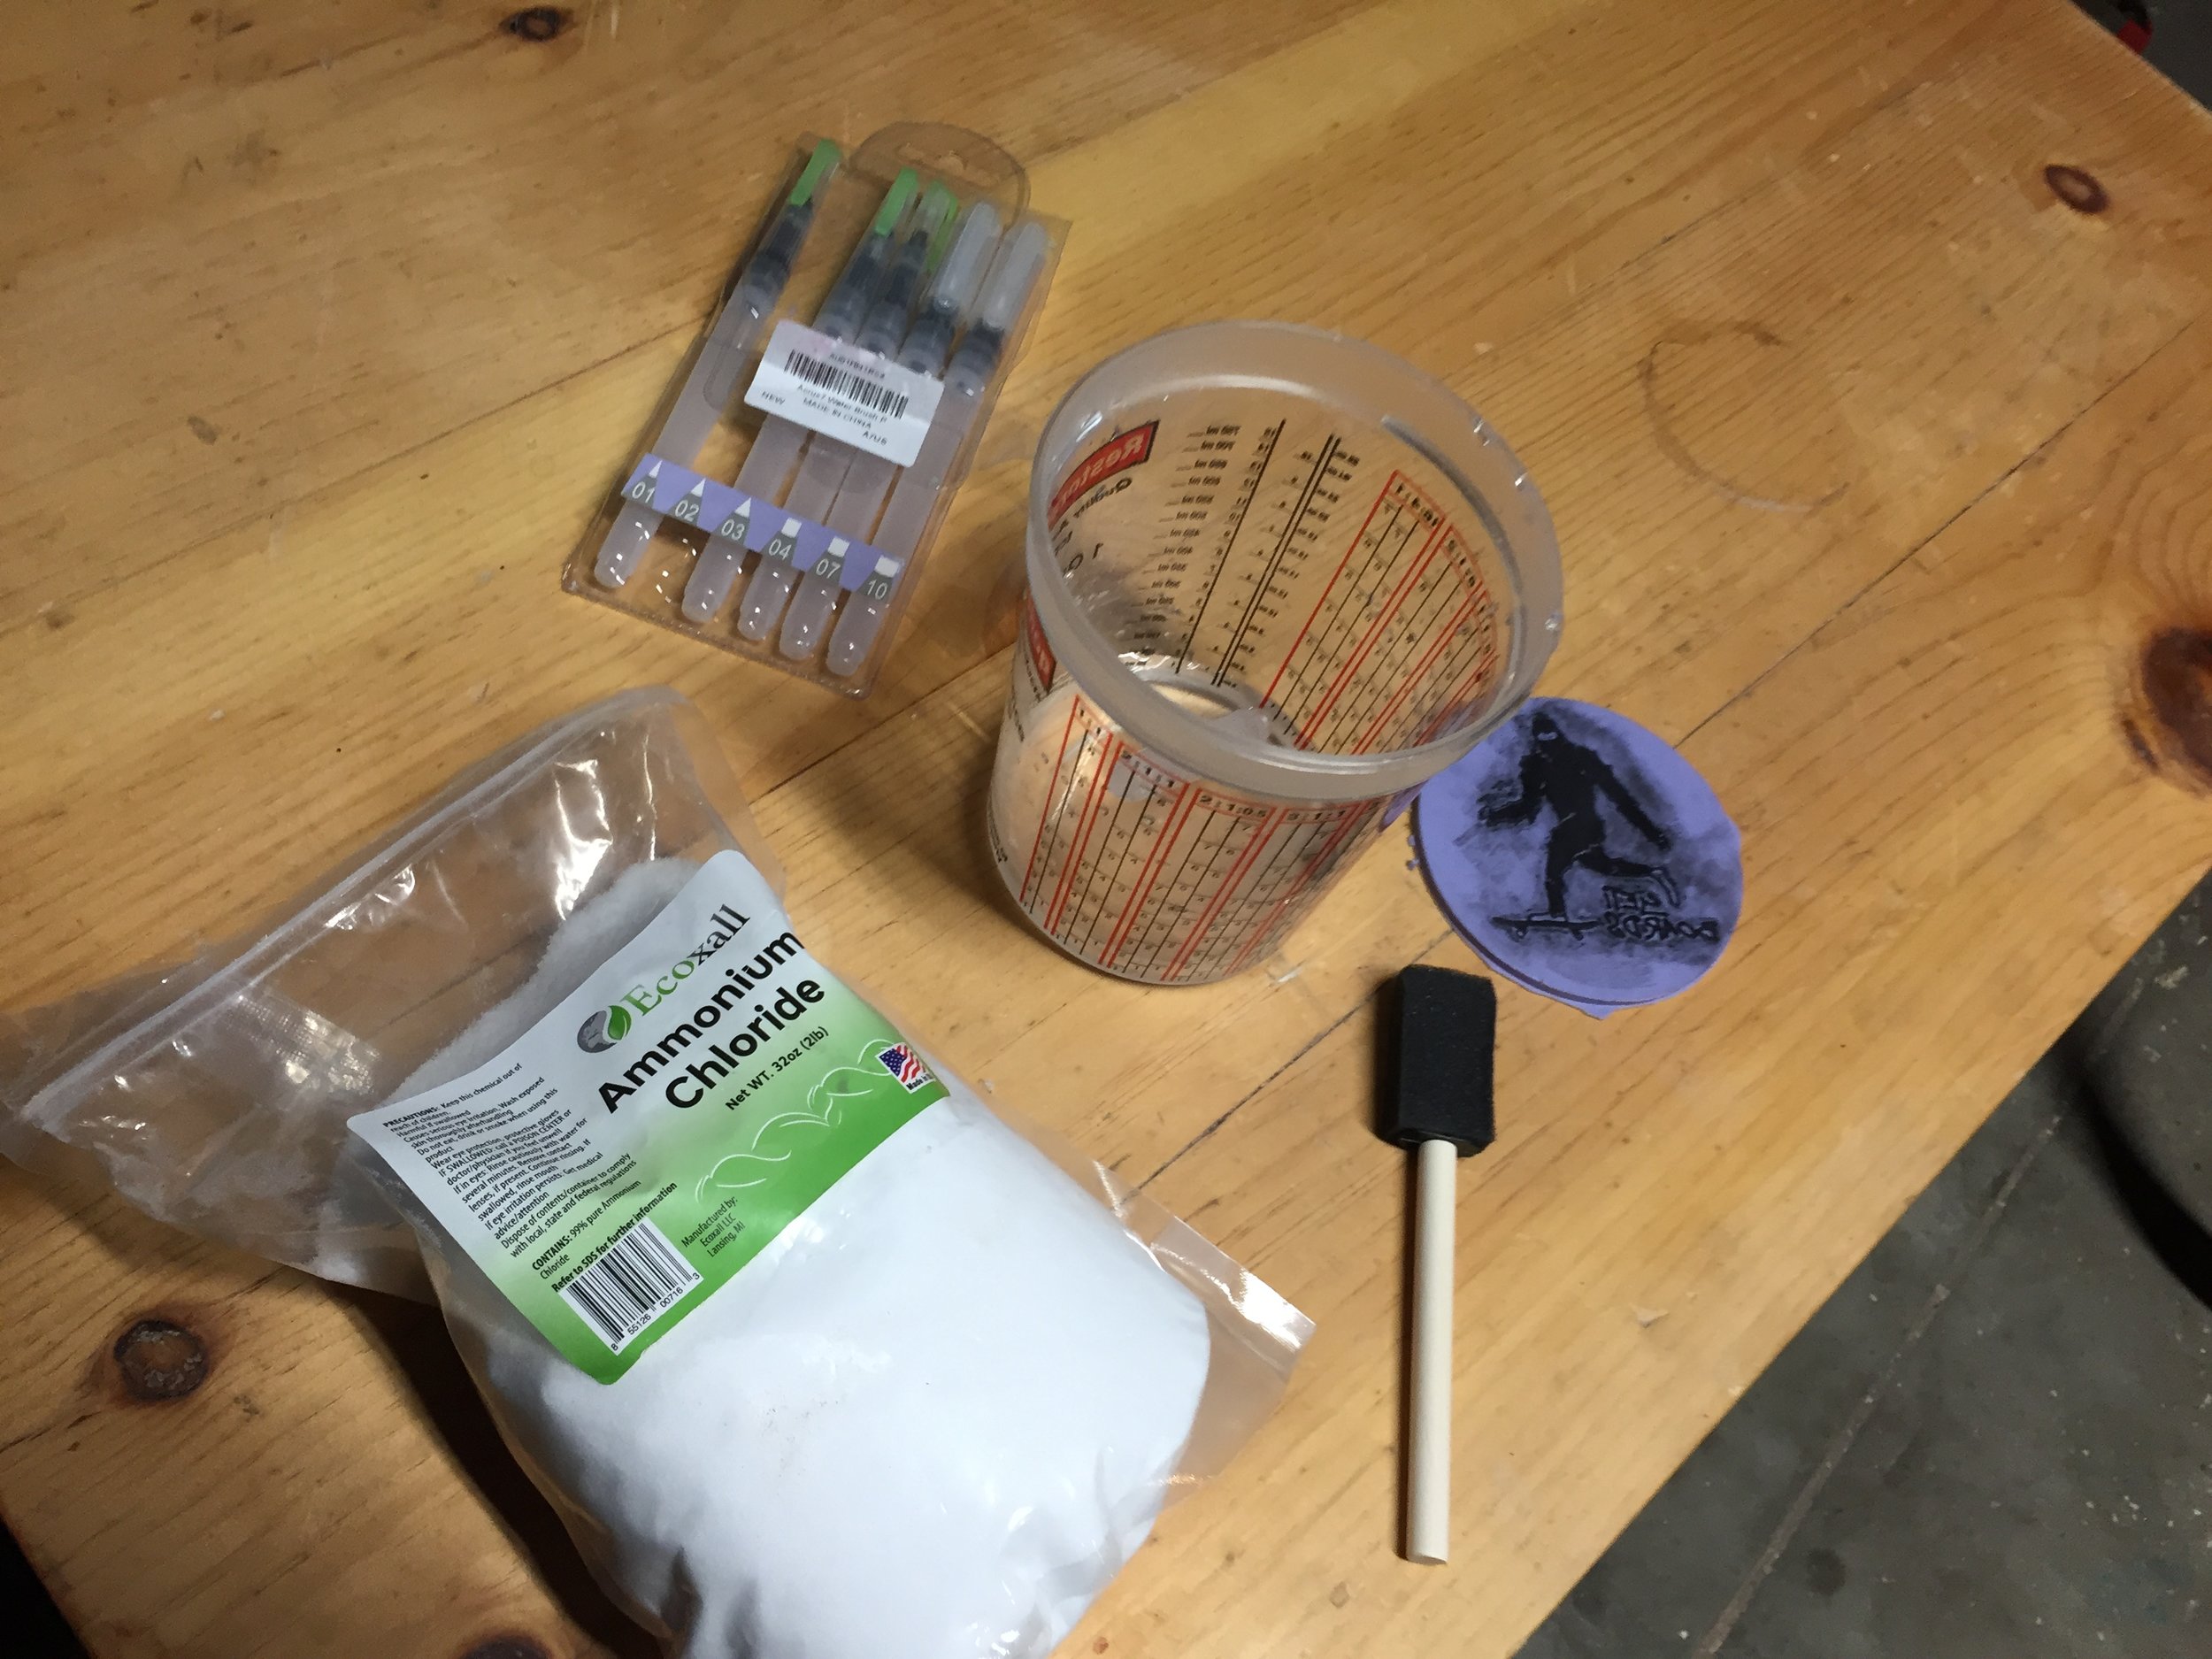
Wood Burning - I wanted to try a new type of embellishment on this board; wood burning. If you take 1 TBSP of Ammonium Chloride (also know as Sal Ammoniac, a flavoring in some types of licorice) and dissolve it in 1/2 cup of water, it becomes an invisible ink of sorts. If you fill an empty pen with the liquid, draw a design on wood and then heat it with a hot air gun, the drawn design will selectively burn. You can control the color of the burn (from yellow/orange/ to dark brown) with the amount of heat applied to the design.

I wrote my initials in with a filled pen and also used a rubber stamp to make the Yeti design. I messed up the stamping a couple times, sanding in between to "reset" the surface. It appears as though the solution had leached below the level in the wood that I sanded off. Thus, the yeti came out a little muddled but I kind of liked the look, so I kept it.
Glamour Shots

The slender width of the board works well with the wide trucks. You can perform deep carves without the worry of wheel bite.

The Yeti and initials wood burnings really pop with a little natural colored stain and poly.

Notice the kick tail and the camber. It's subtle, but it works. I quite like the way this board rides.
Lessons Learned:
Instructions are meant to be followed!: Usually I'm pretty good at reading the instructions before using new tools/toys that I acquire. The steamer kit instructions told me to build a steam box; so I did. I sized it fit the largest possible piece of wood I'd consider steaming. The internal dimensions of the box ended up being 12"X8"x48". After the first attempted steaming, where the internal temperature in the box never even reached the target 100 C, I revisited the instructions to see if there was something I missed. Yep, included were blueprints for the steam box with dimensions 6"X6"X36" or 1/4 the internal volume of the box I made. Ooops, no wonder the steamer couldn't keep up; it couldn't provide enough energy on a single fill of water to even get the enclosure up to temperature. Fortunately, the instructions did have two suggestions on how to overcome this sizing issue: 1) insulate the box, 2) preheat the box for an hour, refill the water reservoir and then steam for the appropriate amount of time. I employed both fixes and the issues seemed to be solved. Still, the next iteration of the steam box will be built to the recommended specifications to avoid this issue altogether.
Air Dried >>> Kiln Dried: When wood is kiln dried the lignen hardens the cell walls in the wood. The benefit of this for normal woodworking projects is that the "hardened" cell walls of the kiln dried wood is more dimensionally stable than green (un-dried) or air dried wood. Unfortunately for wood that is to be steam bent, the hardened cell walls make it hard for the wood, even when appropriately steamed, to bend to tight radii. Unfortunately the wood I bought for this project was, you guesses it, Kiln Dried. I tried three separate steams, each with progressively longer steaming time, but even after its longest steam the KD wood could not be bent around the radius of the kick tail. The next attempt at steam bending will surely be with green or air dried wood.